The extra actions of log in into mailboxes and searching for activation mail in inbox and then clicking on them, really bothered users those days. But this adds an extra step of security for identity threat. Now you cannot find a website where you won’t be needing email or phone number validation. In this blog I will discuss step by step how can the email address verification be added to a PHP based web application.
Step 1: Database (Split it up)
For dynamic web applications database does play a very crucial role because most of the contents of the application are stored in database and they get pulled up logically based on the code and logic written on the pages.
All user’s information are stored in database tables. A lazy and early days programmer store all user information in one table. But to implement the email verification feature and for the sake of best practices we will segregate user’s attributes into 2 categories and use 2 separate tables
- user_account_master – For Account Attributes
- user_profile_master – For Profile Attributes
Account Attributes are attributes necessary to have users’ account set up and ready to authenticate.
Examples of Account attributes are , username, email address, password etc.
Profile Attributes are the additional attributes related to the users. Examples of profile attributes are First name, Last name, Address etc.
In this post we will deal with only account attributes so the table we will be considering is only user_account_master.
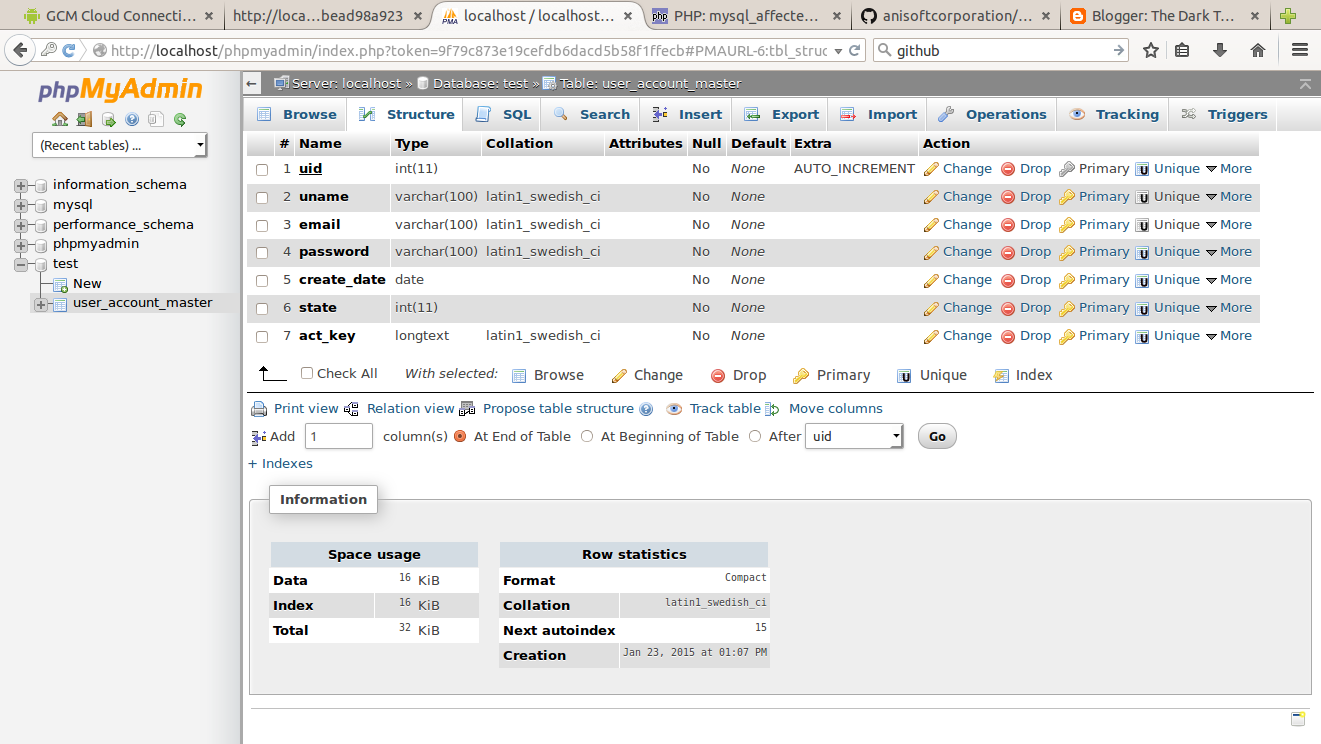
This table will have regular attributes for login except the below 2
1. act_key
2. status
The ‘status’ column will have integer value and we will consider
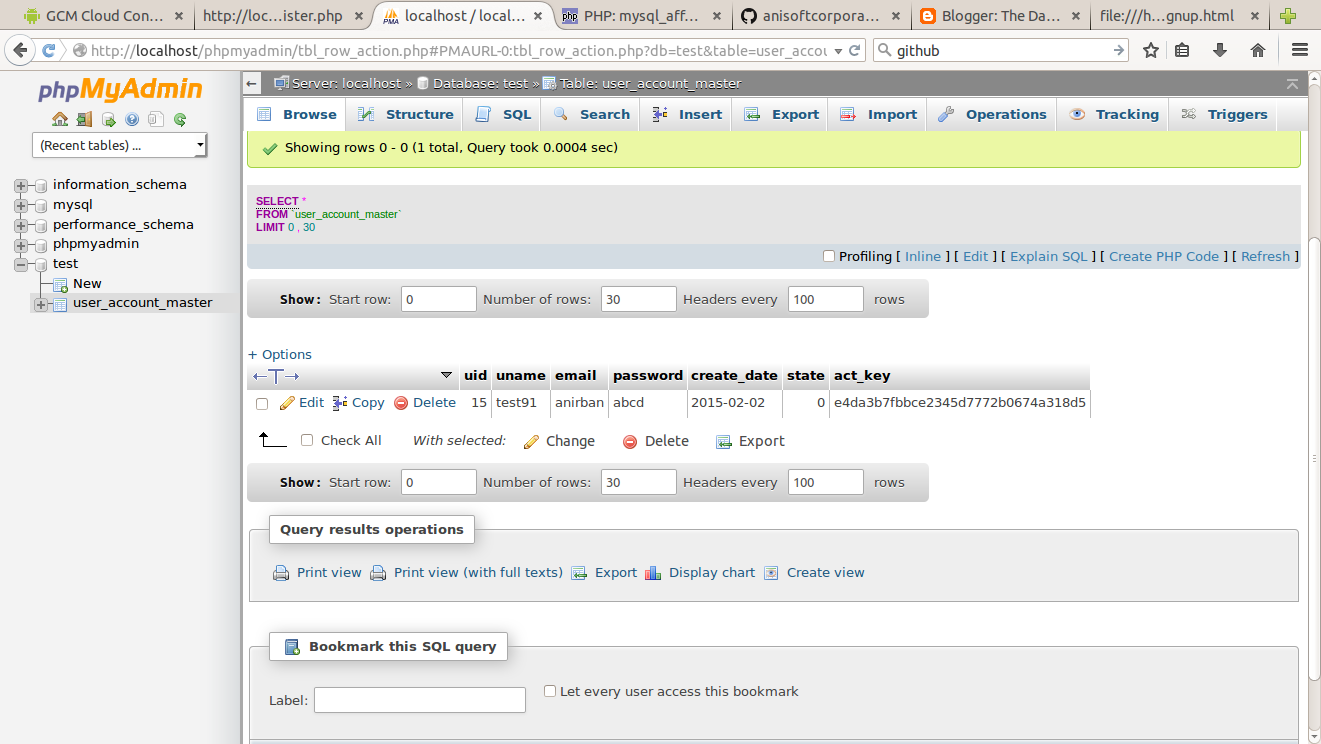
0 = Activation Required
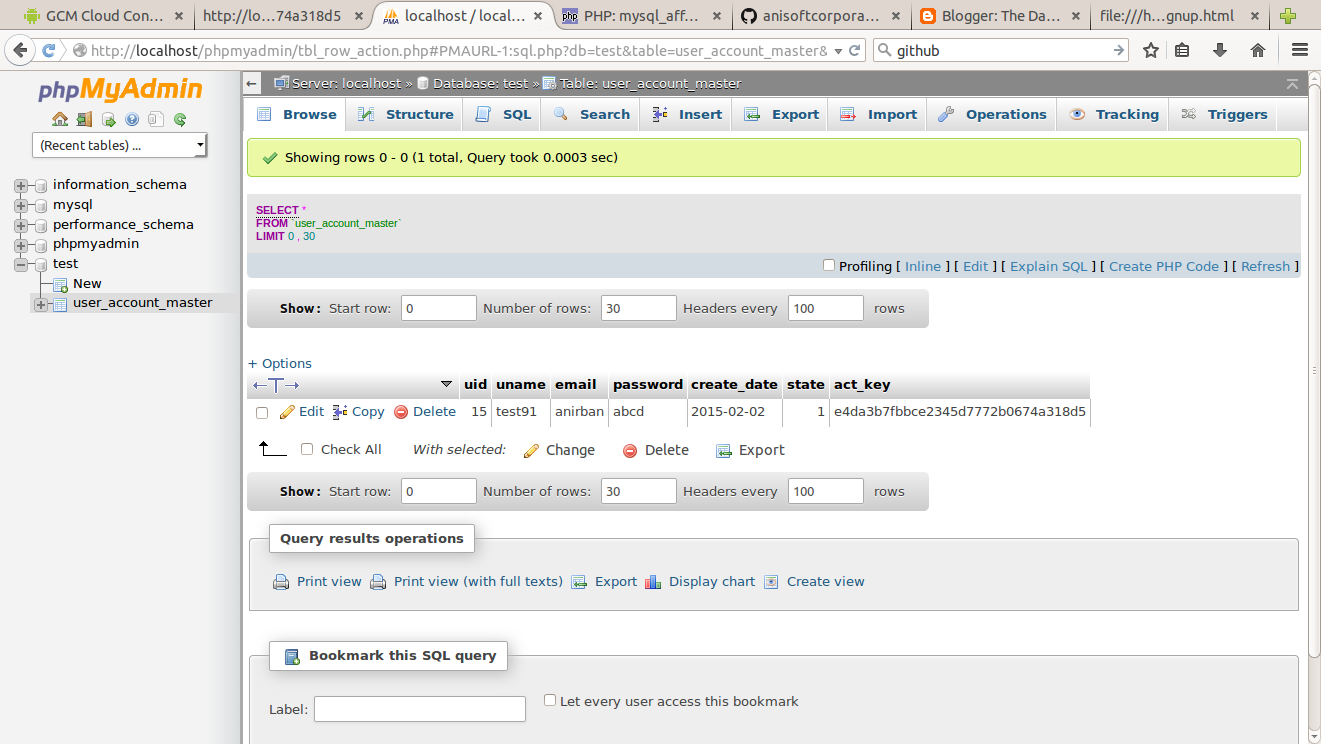
1 = Active
The act_key will hold the encrypted value of the Activation key or OTP.
So the complete user_account_master will look as below
 |
| user_account_master |
Step 2: Signup Page
This is a simple HTML page with a very simple form. This page serves as the first page where users will be asked to provide only few details required for signup.
User Name
Password
Confirm Password
Email Address
Confirm Email Address
So our basic Signup.html will have the below HTML code
Username
Email Address
Password
Retype Password
Step 3 : register.php
Once the previous HTML page is submitted the form will be posted to a PHP page. In this PHP page will do the below actions one by one
- Generate a random key.
This is how we can generate a random key. This will give a random integer number between 1 and 100. You can use any logic you want.
rand(1,100)
- Hash that key (I used MD5). I used below code to generate and hash altogether.
$key = md5(rand(1,100));
- Insert other account details and the hashed key into database. While inserting the value of status column will be 0
$password=$_REQUEST[‘passwd’];
$email=$_REQUEST[’email’];
$key = md5(rand(1,100));
$query=”insert into user_account_master values(”,’$uname’,’$email’,’$password’,now(),0,’$key’)”;
mysql_query($query);
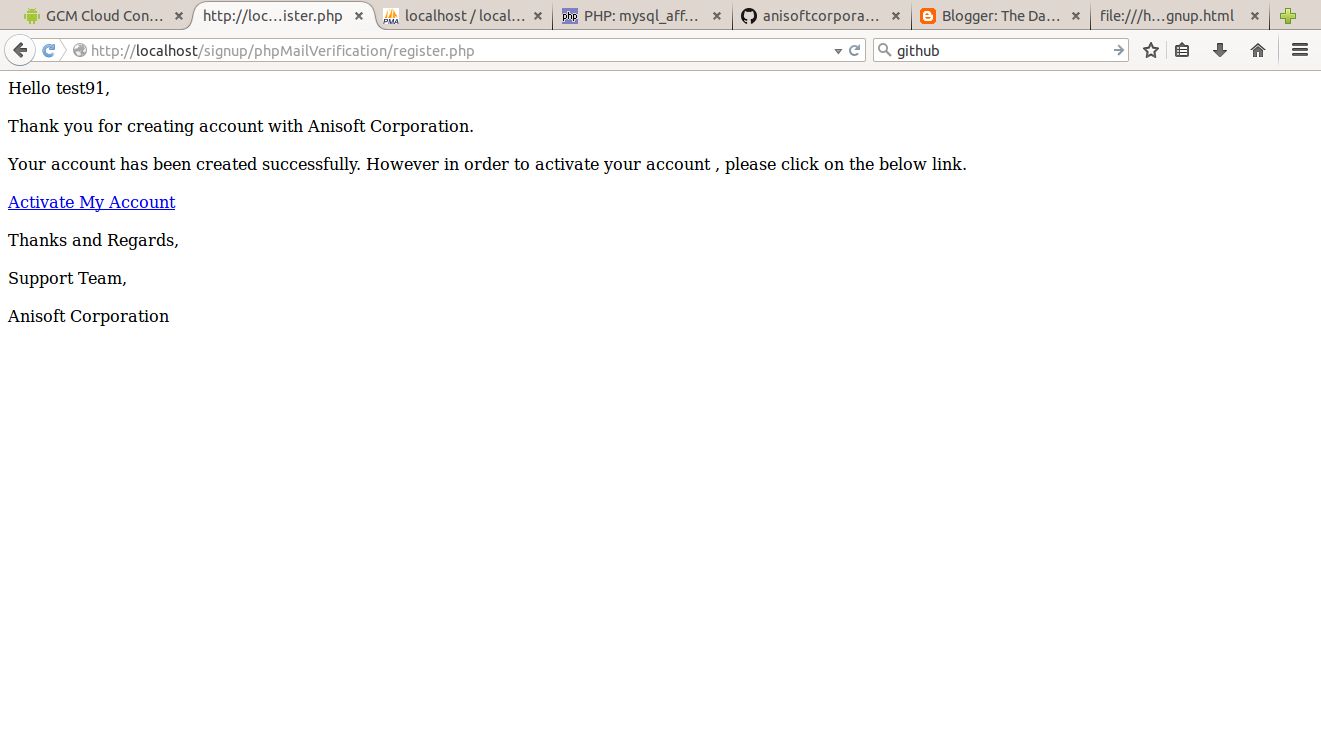
- Generate the content of the email and activation url to be sent to user.
{
$body =CONTENT1.$uname.CONTENT2.CONTENT3.CONTENT4.CONTENT5.SITE_URL.”/activate.php?uid=”.$uid.”&key=”.$key.CONTENT6.CONTENT7.CONTENT8.SITE_NAME;
return $body;
 |
| Activation Email Content |
 |
| After Signup |
- uid
- key
The url formed during registration process will be of the below format
http://example.com/activate.php?uid=12345&key=xxxxxxxxxxxxxxxxxxx
This page will simply update the status in user_account_master table for the record matching the uid and key passed in url.
$uid=$_REQUEST[‘uid’];
$key=$_REQUEST[‘key’];
mysql_query($update_query);
$num= mysql_affected_rows();
 |
| After Activation |
5. Secure Login Page
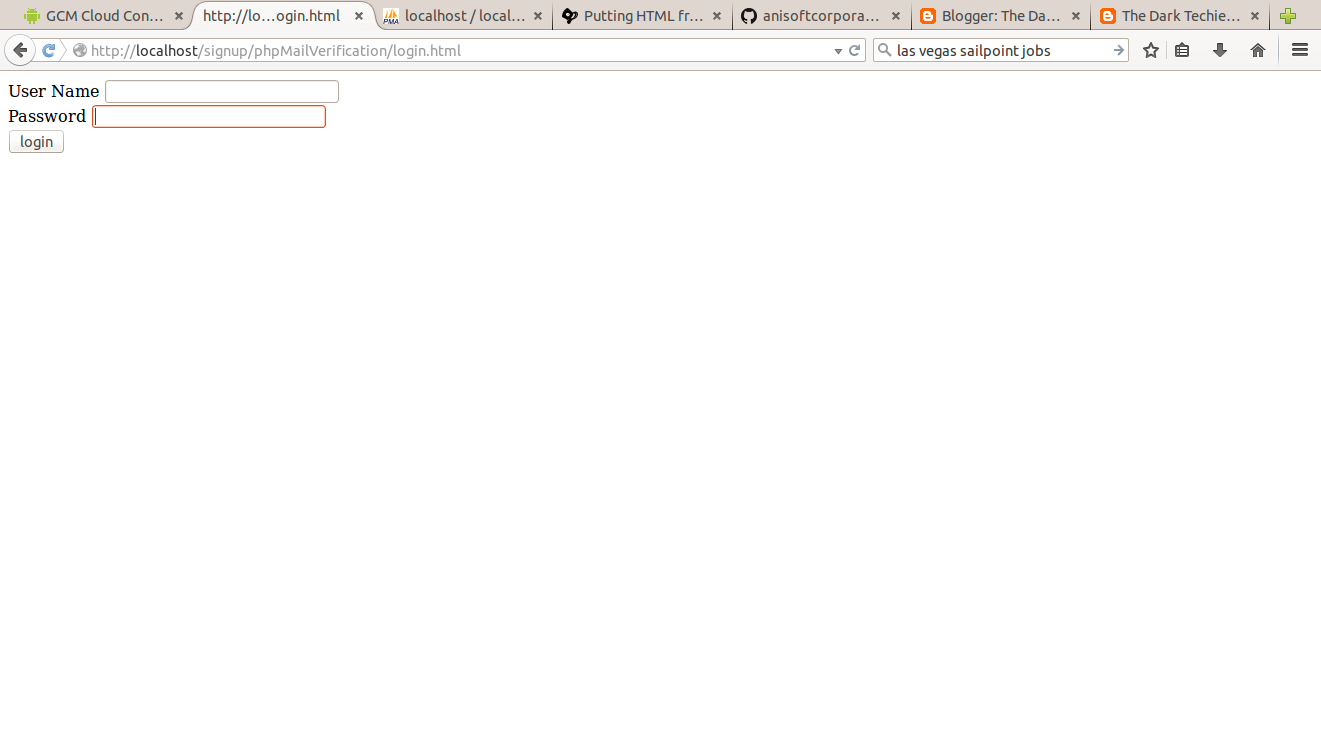 |
| Login Form |
$uname=$_REQUEST[‘uname’];
$password=$_REQUEST[‘passwd’];
$login_query=”select * from user_account_master where uname=’$uname’ and password=’$password’ and state=1″;
$login_result=mysql_query($login_query);
$num_rows=mysql_num_rows($login_result);
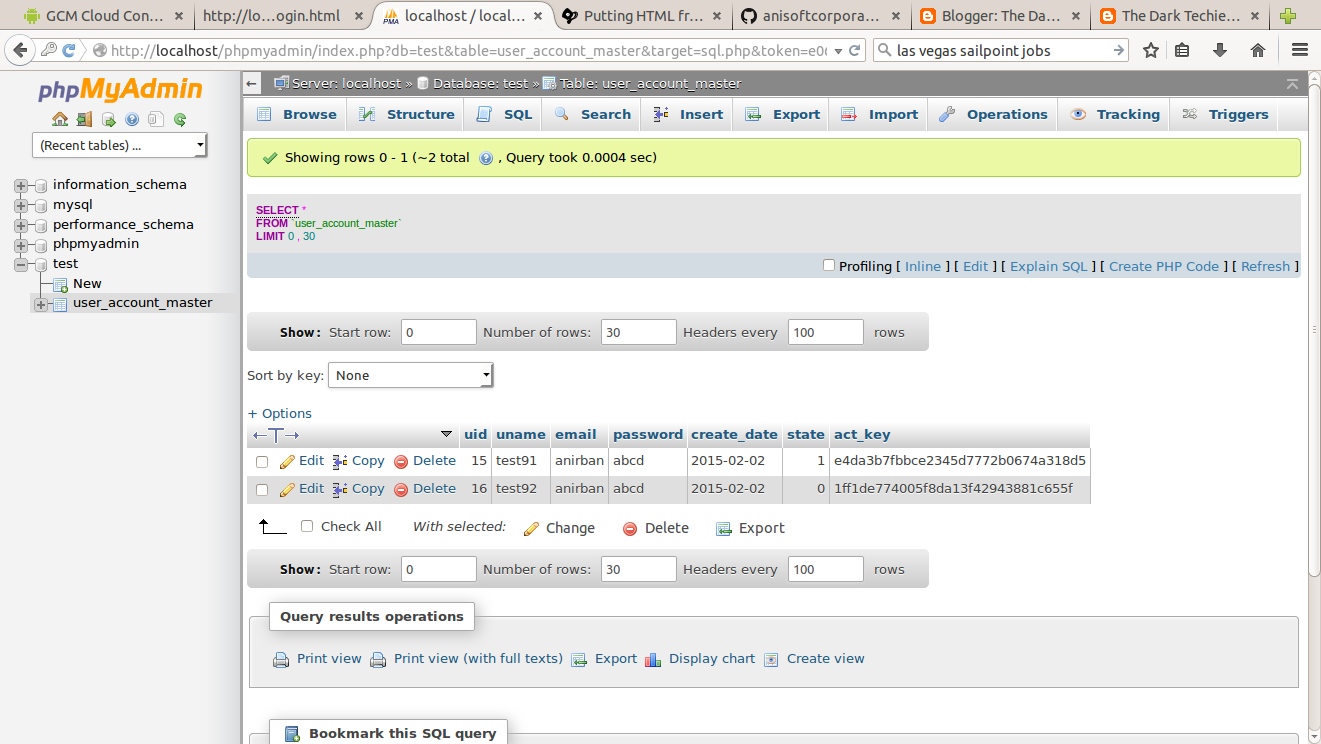 |
| Both types of accounts |
Final words


